|
|
|
|
|
|
|
|
|
|
|
|
|
|
|
|
|
|
|
|
|
|
|
|
|
|
|
|
|
|
|
|
|
|
|
|
|
|
|
|
|
|
|
|
 |
||||||||||||||||||||||||||||||
|
|
||||||||||||||||||||||||||||||
|
||||||||||||||||||||||||||||||
|
One spool each of 1/4-inch wide Offray ribbon in pink, white, and blue. Use the type with a plain edge, not the kind with loops on the sides. Three spools (one of each color) should make 60 ribbons. |
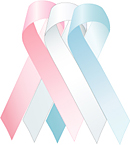 GBS Awareness Ribbons |
|
|
60-70 3/4-inch pin backs in either brass or silver. |
||
|
Glue gun and glue sticks (the mini glue guns work great!) |
| 1 |
Cut the ribbon straight across into six inch lengths.(The ends are easier to trim at a diagonal after the pin is assembled, that the angle on all the ribbon ends matches.) |
|
| 2 |
Hold the pin back with its flat "face" toward you, with the opening part to the right. |
|
| 3 |
Put a line of hot glue across the face of the pin back. (Caution: Use a glove or wax paper to hold the pin back so you don't get burned.) |
|
| 4 | Lay one ribbon of each color across the across the pin at an angle, going from the seven o'clock position at the bottom to one o'clock at the top, with about 2 inches of ribbon hanging below the pin back. The pink ribbon should be on the left, then the white in the middle, then the blue ribbon on the right. It's easier to have the natural curl of the ribbon (from being on the spool) toward you, to make it easier to glue down for the next step. The pin back should be somewhat closer to the top of the loops than to the bottoms of the ribbons, otherwise the weight of the loops pulls the pin forward and it doesn't hang as nicely when it's being worn. |
 Step 4 |
| 5 |
Put another line of hot glue across the portion of the ribbon covering the pin back. |
 Step 5 |
| 6 |
Loop the ribbons over to the right, placing the right-side ends at the five o'clock position so that they line up with the bottom of the left-side ends of the ribbons. |
 Step 6 |
| 7 |
Trim the ends at a diagonal to make them look uniform and keep them from fraying. Note the sample has the diagonal in the back ribbons going up to the left outside and as it loops over the right diagonal goes up to the right outside. Pick off stray glue strings after drying. |
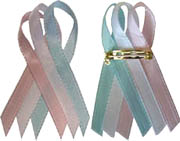 Finished ribbons! |


